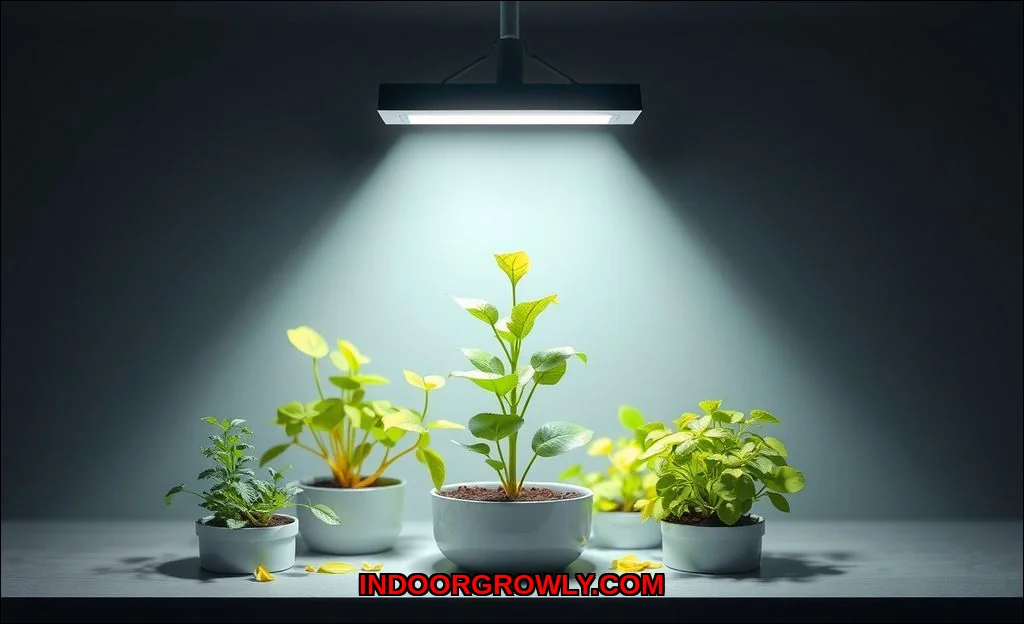
Starting your first indoor garden is exciting. You’ve got your seeds, your pots, and maybe even a dedicated space. But when you look at a smart grow light, the technology can feel intimidating. What does all that spectrum control mean? How long should the lights really be on? This is where a smart grow light app becomes your secret weapon. It transforms a complex piece of hardware into a friendly, automated assistant that handles the science for you.
Think of the app as the brain of your operation. Instead of manually flipping switches and guessing at settings, you control everything from your smartphone. For a beginner plant grower, this removes the overwhelming guesswork and replaces it with confidence. A good starting point is a user-friendly system like the Necgemlex Smart LED, which pairs with a straightforward smartphone app for grow lights to get you growing right away.
What Are Smart Grow Light Apps? Demystifying the Technology
At its core, a smart grow light app is a mobile application that connects to your light via Wi-Fi or Bluetooth. This connection allows two-way communication. You send commands (like “turn on” or “set to tomato mode”), and the light sends back data (like its current status or runtime). The app typically communicates with a cloud server, which is what enables remote management from anywhere. You’re not just buying a light; you’re buying an ecosystem designed for plant growth monitoring and automation.
Core Functions: What These Apps Actually Do for You
So, what magic happens when you open that indoor gardening app? It boils down to three pillars: automation, customization, and observation.
1. Automated Light Scheduling (The Set-It-and-Forget-It Feature)
This is the single biggest benefit for beginners. Plants thrive on consistency, following a daily photoperiod (their light and dark cycle). Manually remembering to turn lights on and off at 6 AM and 10 PM is a recipe for failure. With an automated light schedule, you program it once. The app handles sunrise and sunset for your plants every single day, even when you’re on vacation. This consistency is critical for healthy growth.
2. Light Spectrum & Intensity Control
Advanced lights use different colored LEDs (Blue, Red, Far-Red) to mimic the sun’s changing light through the seasons. A beginner-friendly app simplifies this. Instead of confusing sliders, you often get “plant recipes” or growth stage presets (Seedling, Vegetative, Flowering). Tap “Lettuce,” and the app automatically applies the ideal spectrum and intensity. You can still manually adjust light intensity if needed, but the presets are where you should start. For more on tailoring light to specific plants, see our guide on the ideal light spectrum for growing herbs.
3. Remote Monitoring & Control
Forgot to turn the lights off before a weekend trip? No problem. With smartphone control, you can check status and make changes from anywhere. This remote management is more than a convenience; it’s peace of mind. You can also receive notifications if there’s a power outage or connectivity issue.
4. Growth Tracking & Plant Database
Many apps include a built-in plant database with care guides. You can log when you watered, added nutrients, or pruned. Some even let you take photos to track progress over time. This turns your app into a digital gardening journal, helping you learn what works best for your specific environment.
Key Features Beginners Should Prioritize
With so many options, focus on features that reduce complexity, not add to it. Heres what to look for in a best smart grow light app for beginners.
- Pre-Programmed Plant Presets: The best feature for new gardeners. Look for an app with a wide library of common houseplants, vegetables, and herbs.
- Simple, Intuitive Scheduling: A clean calendar or timer interface where you can easily set on/off times or sunrise/sunset simulations.
- Clear Metrics: If the app shows light metrics, it should explain them. Understanding that a preset provides the right PPFD (Photosynthetic Photon Flux Density) for your plant is better than just seeing a number.
- Reliable Notifications: Alerts for schedule changes, disconnections, or completed cycles keep you informed.
- Smart Home Integration: Can it work with Google Home, Alexa, or Apple HomeKit? This allows for voice control and scenes (e.g., “Hey Google, turn on the grow lights”).
Remember, the primary value is the removal of guesswork. As one expert insight puts it: apps provide pre-programmed ‘plant recipes’ for common species, automating complex light recipes based on growth stage. Start there.
Common Beginner Mistakes to Avoid with App Settings
Even with an app, it’s easy to overcomplicate things. Here are the top pitfalls to sidestep.
- Over-Tweaking the Spectrum: Beginners often dive into manual spectrum control, creating custom purple glows. Expert advice is clear: start with the app’s presets. Focus on consistent scheduling and correct hanging height before you ever touch advanced color ratios.
- Ignoring Light Intensity & Distance: An app can set the spectrum, but if your light is hung too high or too low, the intensity (DLC (Daily Light Integral)) will be wrong. Use the app’s settings, but always check the manufacturer’s height guidelines. For example, getting the right light brightness for lettuce is a combination of app settings and physical positioning.
- Setting Unrealistic Schedules: More light is not always better. Mimic natural day lengths. Giving seedlings 24 hours of light can stress them. Use the app’s presets or research the natural photoperiod for your plant.
- Neglecting the Manual (for the Light Itself): The app controls the logic, but the light fixture has physical requirements. Understand its cooling needs, proper electrical setup, and how to reset it if Wi-Fi drops.
Getting Started: Your First Week with a Smart Grow Light App
Your new light and app are set up. Now what? Follow this practical first-week plan to build confidence.
| Day | Action | Goal |
|---|---|---|
| Day 1 | Install the app, connect your light, and explore the plant database. Pick a preset for your plant. | Establish connection and choose your baseline “recipe.” |
| Day 2-3 | Set a simple automated schedule (e.g., 12-16 hours on). Do not make any other changes. | Observe plant response to consistent light. Watch for perkiness or signs of stress. |
| Day 4-5 | Experiment with remote control. Turn the lights on/off from another room or your workplace. | Become comfortable with the remote management functionality. |
| Day 6-7 | Take a “Day 7” photo in the app’s journal (if it has one). Note any observations. | Establish a tracking habit and complete your first successful cycle. |
This gradual approach helps you answer the question, “how to use a grow light app for houseplants” without feeling overwhelmed. You learn one feature at a time.
Are Smart Grow Light Apps Worth It for New Gardeners?
Absolutely. The initial learning curve is far shallower than trying to master standalone timers and manual dimmers. An app consolidates control, provides education through presets, and builds your confidence through automation. It turns abstract concepts like PPFD (Photosynthetic Photon Flux Density) into a simple button labeled “Grow Tomatoes.”
For further reading on selecting the hardware that powers these apps, trusted gardening resources like Epic Gardening’s comprehensive guide to grow lights and the University of Minnesota Extension’s guide to indoor plant lighting offer excellent, science-backed foundations.
Your journey as a beginner plant grower is supposed to be rewarding, not frustrating. A smart grow light app hands you the tools that used to be reserved for commercial growers. It lets you focus on the joy of watching things grow, while it handles the precise, daily science of light. Start with the presets, trust the schedule, and use the app to learn. Your plants will show you the results.